Installing Distance Sensor
Do you know that RAPIRO has a space where you can put distance sensor? This post shows how to use the sensor, "GP2Y0A21YK", with RAPIRO.
RAPIRO Control board is designed to compatible with Arduino and has I2C terminal and analog terminal for expansion. Let's make RAPIRO to change the eye color in respond to the value from the sensor.
Things to Prepare
- RAPIRO
- Infrared proximity sensor "GP2Y0A21YK" and connecting cable
- Raspberry Pi Type B is used in this article.
- Pin header and Pin socket
- Solder and soldering iron
Soldering
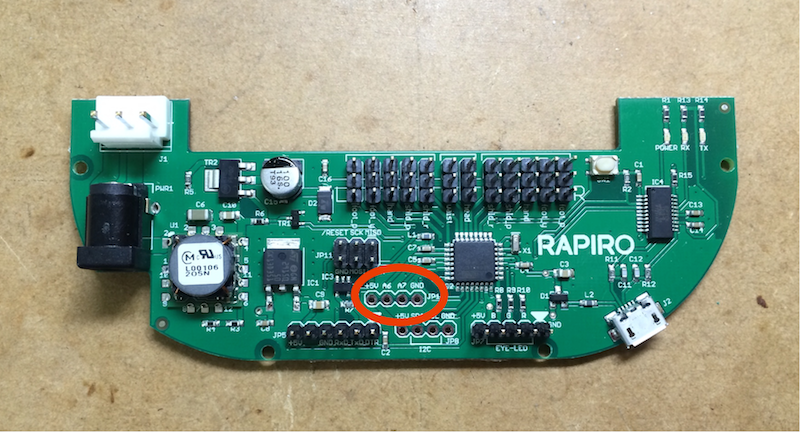
rapiro-servo-controller-boad.png
First, take RAPIRO Board out from Rapiro then solder the pin header to the area where circled in red on this picture.
When you have finished it then solder a cable.
Prepare 4-legs of pin socket, and put the cable to the pin header. From the left side, red cable(5V), yellow cable(signal), skip 1 leg and black cable(GND). I summarized it by heat shrinkable tube.
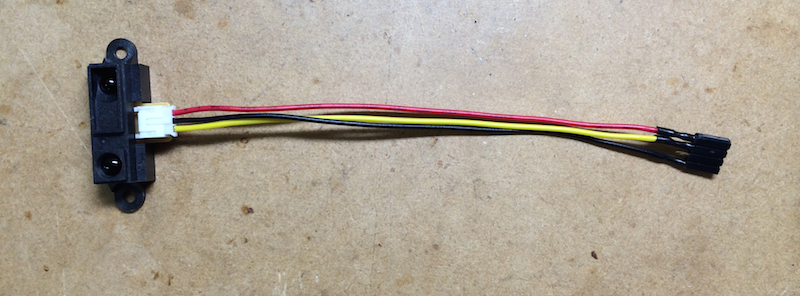
harnes.png
Installing
When you put the RAPIRO Board back, before putting the lid, put the proximity sensor to the area where you can see a space at the part of the RAPIRO's jaw.
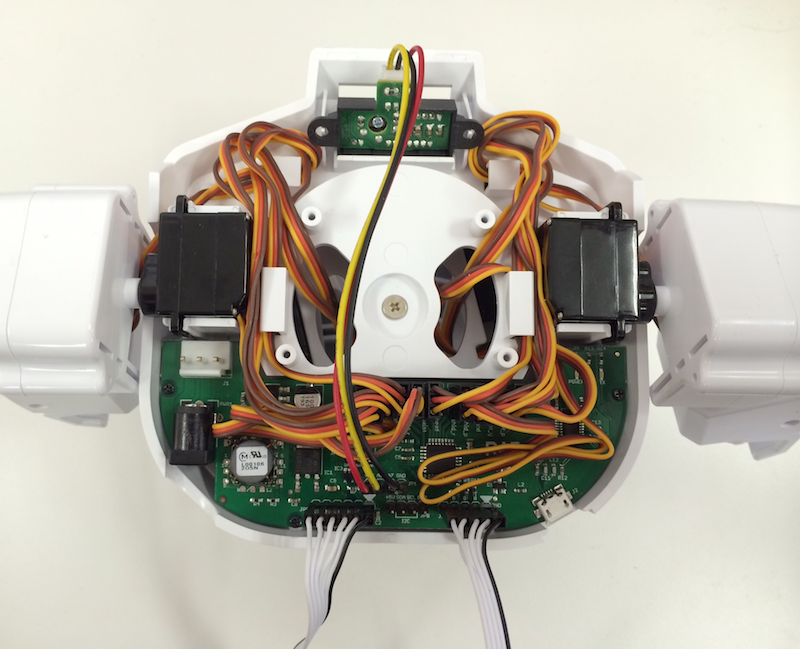
rapiro-cables.png
Also refer to: Photo album
After you put the head back, the hardware is ready.
Software
Rewriting the Firmware
First, rewrite the firmware of RAPIRO control board for being able to read analog values. The default sample firmware is available from Ishiwatari's repository on github.(Ishiwatari is the creator of Rapiro.) However you need a little amendment to the firmware to read analog signal. Helpfully, oga, a user of Rapiro, shows his own firmware with which we can read analog signal without any change. Thank you very much oga.
The firmware available from oga's repository on github. Zip file is here.
When you have started the Arduino and opened the firmware, connect RAPIRO control board to your computer and write the firmware. RARIRO control board behave like Arudino UNO, so you set the writing board as Arduino UNO.
After you write the firmware, open serial monitor on Arduino IDE. Set the baud rate 57600 then input #A6, so you will see the value from the sensor. The number followed by #A is a pin number of Arduino.
Communication with Raspberry Pi
The firmware which you wrote to Arduino Board not only has motion commands like #M01 but also has more specific commands. With those commands, you can set how long, which actuator how to work. The syntax is below.
Commands:
#P<commands for servos and leds>T<duration(ms)>
Commands for servos:
S<ID of servo>A<angle>
Commands for LEDs:
Red:R<Brightness(255 is maximum)>
Green:G<Brightness(255 is maximum)>
Blue:B<Brightness(255 is maximum)>
Sorry if it's not easy to understand. Here I show you a sample of using commands for LEDs. Once you open the serial monitor of Arduino IDE, input command #PR255G000B000T001. You will see the eye changed to red. Next put command #PR000G255B000T001 then you will see the eye changed to green. Now you know how to change the color of the eyes so try to change the eyes to yellow by yourself.
Now you know how to command Rapiro from Raspberry Pi. So you can command Rapiro with your favorite language.
Below is a sample code of python. This code require PySerial. So you want to install it, if you haven't yet.
You also need to prevent the Linux to using the serial port, otherwise, you can't read from /dev/ttyAMA0 from python.
rapiro_led.py:
import sys
import time
import serial
import colorsys

# config
SENSOR_PIN = 6
RAPIRO_TTY = '/dev/ttyAMA0'
rapiro = serial.Serial(RAPIRO_TTY, 57600, timeout = 10)
value = 0

# version check
rapiro.write("#V")
time.sleep(0.05)
version = ""
while rapiro.inWaiting():
    version += rapiro.read(1)
version = version.split("#Ver")[1]

if(version != "00"):
    print "ERROR: Firmware of Rapiro is different."
    sys.exit(1)

# main loop
while True:
    rapiro.flush() # cleaning
    rapiro.write("#A"+str(SENSOR_PIN)) # sensor request
    time.sleep(0.05)
    buf = ''
    while rapiro.inWaiting():
        buf += rapiro.read(1)
    value = int(buf.split("#A"+str(SENSOR_PIN)+"V")[1])
    rgb = colorsys.hsv_to_rgb(value%2048/2048.0, 1.0, 0.7)
    cmd = "#PR" + str(int(rgb[0]*255)).zfill(3) + "G" + str(int(rgb[1]*255)).zfill(3) + "B" + str(int(rgb[2]*255)).zfill(3) + "T001"
    print "Send: " + cmd
    rapiro.write(cmd)
    time.sleep(0.05)